🪙 GLACIAL GOLD FIELD GUIDE

A Complete Visual Guide to Finding Flour Gold in Northeast Creeks & Rivers
Central NY • Southern NY • Northern PA • All Glaciated Northeast
Compiled by ProspectingPA.com • July 2026
"The gold is there. The glaciers brought it. Your job is to outsmart the river."

What Is Glacial Gold?

"Much of the gold found in the United States was transported by glaciers. They scraped across the earth, breaking apart rocks — some of which contained gold — and carried them for hundreds or even thousands of miles." — RareGoldNuggets.com

Glacial gold is gold that was picked up by massive ice sheets during the Ice Age, hauled south from Canada, and dropped across the northern United States when the glaciers melted. It's the ONLY type of gold found in most of the Northeast — New York, northern Pennsylvania, New England, and the Midwest all owe their gold to the Laurentide Ice Sheet.

Map of the Laurentide Ice Sheet at Last Glacial Maximum
The Laurentide Ice Sheet at its maximum extent — covering most of Canada and the northern United States. THIS is the glacier that brought gold south from the Canadian Shield. The southern margin runs right along the NY/PA border. (Wikimedia Commons, public domain)
KEY FACTS

What Glacial Gold Actually Looks Like

Gold dust / flour gold specimen
Flour gold / gold dust — THIS is what glacial gold looks like. Tiny specks, not big nuggets. Most Northeast gold is this fine or finer. (Wikimedia Commons, Draper Museum)
Large placer gold nugget from California
A placer gold nugget from California — on display at Carnegie Museum in Pittsburgh, PA. Nuggets this size are EXTREMELY RARE in glacial gold country. Don't expect this — celebrate every speck. (Wikimedia Commons, Carnegie Museum)
FIELD NOTES:
Don't let the randomness discourage you. The gold IS there — the same glaciers that dropped gold in Ohio and Michigan dropped it in NY and PA too. The key is systematic sampling: pan many spots, move quickly if no color, and let the black sand guide you. Every speck you find is a hard-won victory in glacier gold country.

The Geology of Glacial Gold

The Glacial Transport Model — How Gold Got from Canada to Your Creek

1Canadian Shield Source: Gold-bearing rock in the Canadian Shield (including the Abitibi Greenstone Belt) was scraped up by the advancing Laurentide Ice Sheet ~75,000 years ago.

2Glacial Transport: The ice sheet — up to a mile thick — ground up the gold-bearing rock as it moved south. Hundreds of miles of transport reduced most gold to flour size. The ice carried granite, quartzite, gneiss, magnetite, garnets — when you see Canadian rocks in a PA or NY creek, you're looking at glacial freight.

3Deposition: As the ice melted (~18,000-14,000 BP), gold-bearing debris was deposited as:

4Stream Concentration: Post-glacial streams cut through the glacial deposits and re-work the sediments. Heavy gold settles into bedrock cracks, behind boulders, and in bend deposits.

5The Randomness Problem: Unlike lode gold areas, glacial gold is scattered randomly. Pan 20 spots with no color, then hit specks in pan #21. Systematic sampling is the #1 strategy.

What Glacial Till Looks Like

Pleistocene glacial till cross-section
Pleistocene glacial till cross-section — unsorted sediment deposited by the ice sheet. This is the material that carries glacial gold. Note the mix of grain sizes: clay, sand, gravel, boulders — all jumbled together. (Wikimedia Commons, Ontario)
Glacially striated pebble from Pleistocene till
A glacially striated pebble — scratches from being dragged in the ice. When you find smoothed, faceted, scratched rocks in your creek, you're in glacial till territory. (Wikimedia Commons, Ohio)

Glacial Erratics — Canadian Rocks in Your Creek

Glacial erratic boulder
A glacial erratic — a boulder transported by ice from its original location. When you see rocks like this in a PA or NY creek, you know the glacier was here. These Canadian rocks are evidence of glacial gold territory. (Wikimedia Commons, CC BY-SA)
Black magnetite sand on a beach
Black magnetite sand — the same heavy mineral that concentrates with gold in your pan. Where black sand settles, gold can settle too. (Wikimedia Commons)

Why Glacial Gold Is Different from Western Gold

FeatureGlacial Gold (NE US)Western Placer Gold
SourceCanadian Shield, hauled hundreds of miles by iceLocal lode veins, eroded into streams
DistributionRandom, scattered — no predictable paystreaksConcentrated downstream from known sources
Gold sizeMostly flour gold (-50 mesh). Pickers/nuggets extremely rareFlakes, pickers, nuggets — coarser near lode source
BedrockSedimentary (Devonian shale) — not gold-bearing but great natural crevicesOften metamorphic/igneous — gold-bearing quartz veins
StrategySample many spots, move quickly, let black sand guide youWork known paystreaks downstream from source

The Bedrock Factor — Nature's Gold Trap

Throughout the NY Southern Tier and northern PA, the bedrock is Devonian shale, siltstone, and sandstone. This sedimentary bedrock is NOT gold-bearing — but it fractures in flat planes, creating excellent natural gold traps. Shale bedding planes and vertical cracks act as natural riffles that trap heavy minerals over thousands of years.

Exposed bedrock in a river
Exposed bedrock in a river — THIS is what you're looking for! Every crack, crevice, and fracture in this bedrock could trap flour gold. Clean out every crack with a crevice tool. This is the #1 technique for glacial flour gold. (Wikimedia Commons, River Severn, CC BY-SA)
THE BEDROCK GOLD PRINCIPLE

"You may be surprised at how much gold is clinging to the sands or small pieces of stone! In a lot of cases, the deepest portion of a bedrock crack or crevice will contain the most value." — goldgold.com

If you find exposed bedrock in a creek, CLEAN OUT EVERY CRACK.

Where to Look — Reading the River for Gold

"Inside bends, behind large boulders, in bedrock crevices, along eroded root-covered banks, in deep pools below waterfalls — all of these locations share the same underlying logic. Once that principle is instinctive, reading a new river becomes second nature." — Garrett.com

The principle is simple: gold drops where water velocity drops. Gold has a specific gravity of 19.3 — the heaviest natural material in a creek. When fast-moving water suddenly slows, heavy materials settle first.

The 7 Gold Traps

1. Inside Bends of Meanders

The #1 most reliable gold trap. When a river bends, water on the OUTSIDE of the curve moves fast and erodes the bank (cut bank). Water on the INSIDE of the curve slows down and deposits material (point bar). Gold settles on the inside bend with the other heavies.

Point bar and cut bank diagram showing inside vs outside bend
Point bar (inside bend) vs cut bank (outside bend). Gold deposits on the INSIDE of the bend where water slows down. The outside bend erodes fast and deep. This is THE key concept for reading rivers — always pan the inside curve! (Wikimedia Commons)

Look for: Gravel bars on the inside curve of bends. Work the HEAD (upstream tip) of the bar where heavies deposit first. Look for dark, heavy concentrations of black sand at the bar head.

2. Behind Boulders and Obstructions

Any large rock in the current creates an eddy behind it (on the downstream side). The slack water drops heavy materials. Dig BEHIND (downstream side) of each boulder — work the gravel accumulated in the eddy.

Prospector panning for gold in a creek at Bonanza Creek
A prospector working a creek at Bonanza Creek, Yukon. Note the boulders and gravel bar — classic gold trap features. The same techniques apply to glacial gold creeks in the Northeast. (Wikimedia Commons, by Janothird)

3. Bedrock Cracks and Crevices

THE #1 SPOT FOR GLACIAL FLOUR GOLD

Devonian shale bedrock has natural fractures and bedding planes that trap gold over thousands of years. If you find exposed bedrock, CLEAN OUT EVERY CRACK. Use a crevice tool, screwdriver, or stiff brush.

Look for: Areas where the creek has cut down to shale bedrock, especially in shallower riffle sections at low water. The deepest part of the crack often has the most gold.

4. Drop Zones — Where Water Velocity Changes

Where fast water suddenly slows: below rapids, at pool entries, where a narrow channel opens into a wide pool. Look for the "foam line" where fast water meets slow water. Pan right along that transition zone.

5. Gravel Bar Heads (Upstream End)

The upstream tip of a gravel bar is where the heaviest materials deposit first. Work the front edge of bars, not the middle. Look for dark, heavy concentrations of black sand at the bar head.

6. Confluences — Where Tributaries Meet the Main River

Where two waterways meet, the mixing of currents creates a velocity drop zone. Gold from BOTH drainages can concentrate at the junction. Work the downstream side of the confluence.

River confluence — Healy Creek meets Nenana River
A river confluence — where a smaller creek meets the main river. The mixing of two currents creates a drop zone where heavy gold settles. Work the downstream side of the junction. (Wikimedia Commons, Alaska, CC BY)

7. Low-Water Exposed Gravel

In summer low water, gravel bars are exposed. These bars have been sorted by thousands of flood events. Sample the deepest, darkest, heaviest-looking gravel. Look for layers of black sand within the gravel.

River Reading Checklist

AVOID THESE SPOTS:
  • Light-colored, sandy, or muddy bottoms — gold can't settle there
  • Deep, fast water — unsafe and gold won't settle in fast current
  • Areas with thick overburden — gold is buried too deep to reach

Indicator Minerals — Gold's Companions

These heavy minerals settle in the same conditions as gold. Learn to recognize them — they tell you gold might be nearby:

Black sand concentrates from panning placer gravels
Black sand (magnetite) concentrates — the #1 indicator. Where black sand concentrates, gold can too. If you see this in your pan, you're in the right spot. (Wikimedia Commons, by Goldplacer)
Almandine garnet specimen
Almandine garnet — garnets are heavy minerals often found with glacial gold. Red/pinkish grains among the black sand are a positive sign. (Wikimedia Commons)

Black Sand (Magnetite)

#1 indicator. Black, heavy, magnetic. "Black sand or magnetite is a similar weight to gold, so it shows up where gold shows up." If you see black sand building up, you're on the right track.

Garnets

Often found with glacial gold. Red/pinkish grains among the black sand. Garnets are heavy minerals that settle in the same conditions as gold.

Non-Magnetic Black Sand

Not all black sand is magnetite. Garnet, zircon, ilmenite, rutile, and kyanite are ALL heavy minerals that accompany gold. Their presence is a positive sign.

Canadian Shield Rocks

Granites, quartzites, gneiss — igneous/metamorphic rocks that don't belong in sedimentary PA/NY. These are glacial erratics, hauled from Canada by the ice sheet. Their presence confirms glacial till territory.

Panning Technique for Glacial Flour Gold

"The biggest mistake beginners make is rushing the process. Flour gold is easily lost if you pan too aggressively. Slow, methodical processing is key." — SeriousDetecting.com

Glacial gold is EXTREMELY FINE — mostly flour gold, -50 mesh and finer (smaller than a grain of salt). Standard panning technique will wash it right out of your pan. You need a modified, gentle approach.

The Flour Gold Panning Method — Step by Step

1Pick your spot. Inside bend, behind boulder, bedrock crack, or gravel bar head. Look for dark, heavy gravel. Check for black sand indicators.

2Dig the right material. Dig the top 6-12 inches of gravel — the layer just above bedrock or clay. If you hit clay, sample just above it — gold can't sink through clay.

3Classify your material. Screen out anything over 1/2 inch. Flour gold is tiny — big rocks waste time and dislodge fines. "Find a spot where the water is at least four to six inches deep and the bottom is flat or slightly sloped."

4Fill pan 1/2 to 2/3 full. Don't overload — glacial till is dense. Less material = better separation.

5Submerge and break up clay. Work material underwater with your hands. Break up ALL clay balls — clay traps gold inside it. "It is important that all clay be eliminated before actual panning begins."

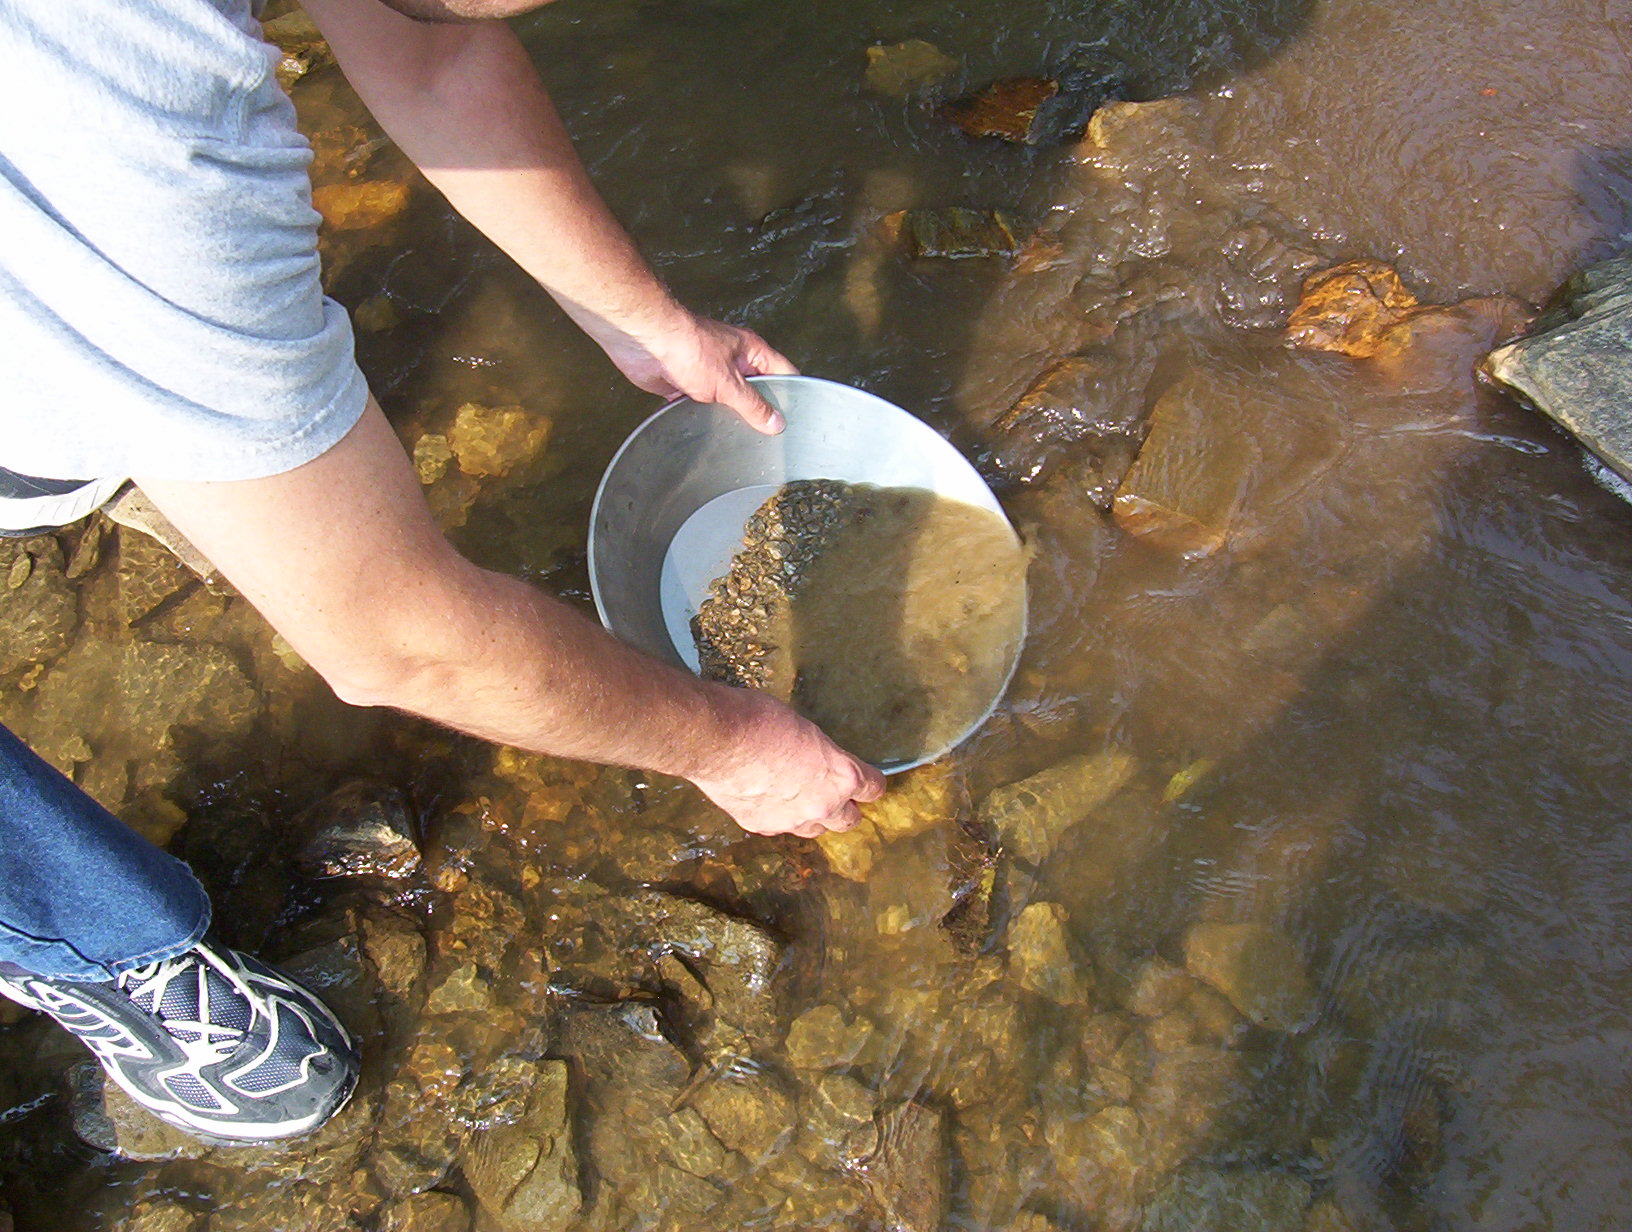
6SLOW, GENTLE swirling. The critical step. Hold the pan submerged. Use a slow, gentle circular motion. Let the water do the work — don't agitate hard. Flour gold is so light that aggressive panning washes it out.

7Work down to black sand. Don't try to pan to visible gold in the field. Get a concentrate of black sand at the bottom. If black sand builds up, you're on the right track.

8Tap and settle. Periodically tap the side of the pan to help heavies settle. A few gentle taps between swirls helps flour gold drop through the black sand.

9Inspect with a loupe. When down to a tablespoon of black sand concentrate, stop. Use your 10x or 20x jeweler's loupe. Look for tiny yellow specks — warm yellow, not brassy.

10Collect with snuffer bottle. If you see color, suck it up immediately. Squeeze the bottle, place the tip near the gold, and release to create suction. Don't risk losing it.

Gold flakes in a lightbox — what you hope to see at the bottom of your pan
Gold flakes in a lightbox — THIS is what you're hoping to see at the bottom of your pan after careful, patient work. In glacial gold country, even a few tiny specks like this are a great day. (Wikimedia Commons)
PRO TIP — THE CAMP PROCESSING METHOD
Don't try to do your final panning at the creek. Gather paydirt in buckets, classify at the creek, and bring the concentrate home for careful final panning. At camp you have good lighting, a stable setup, and no rushing. Label your buckets with the spot name using a Sharpie.

Gold Pan Selection

Color: Dark pans (green, blue, or black) are essential for flour gold. "Black shows gold better, blue and green show black sand better." For glacial gold, GREEN or BLUE is ideal — the contrast between yellow gold, black sand, and the colored pan makes tiny specks easier to spot.

Size: 14-inch pan is the sweet spot. Don't go bigger for flour gold — the material is too dense to manage in a larger pan.

Riffles: Pans with deep riffles trap flour gold effectively. Look for pans with both coarse and fine riffle zones.

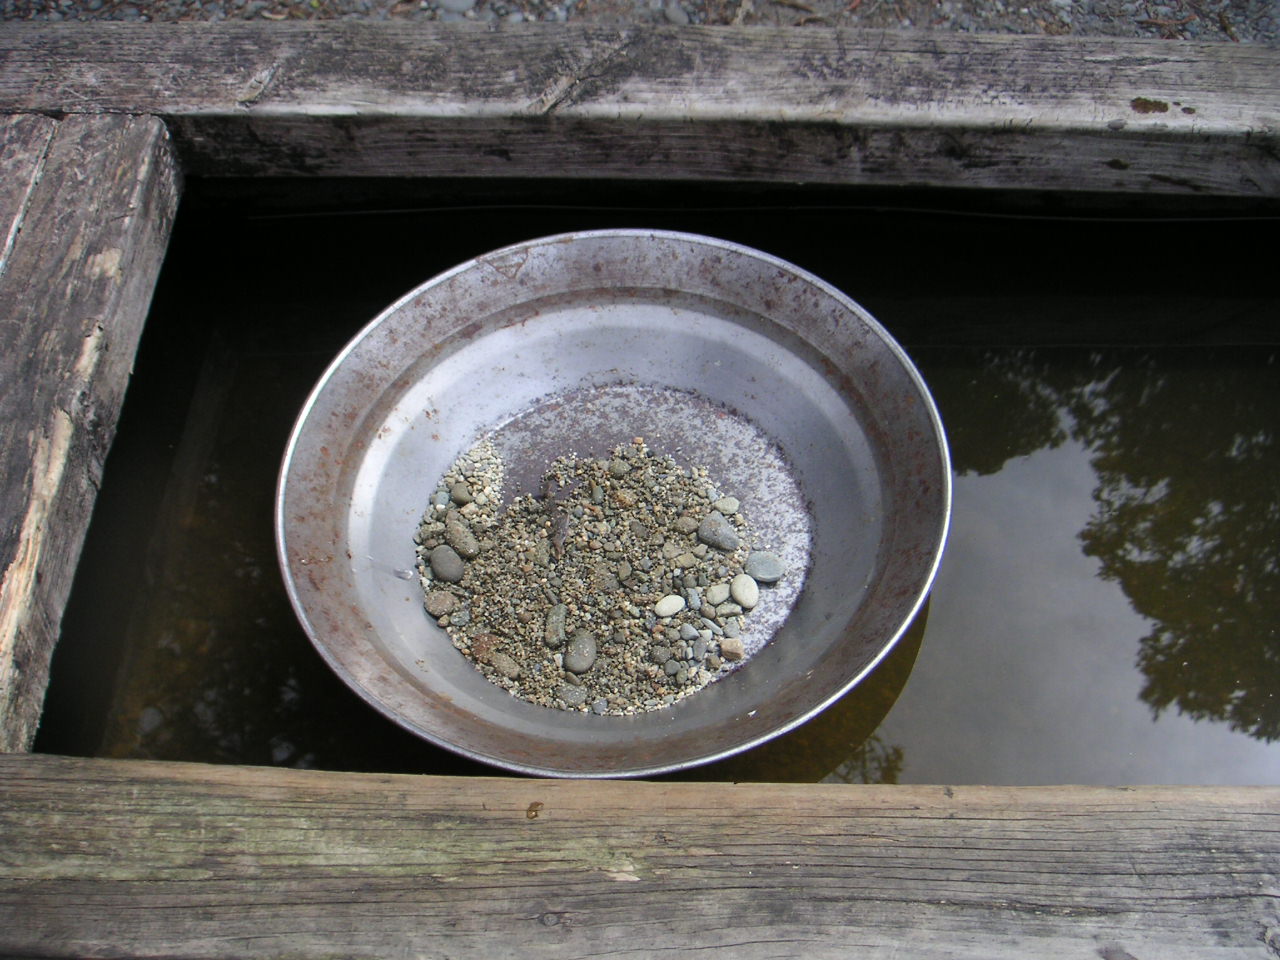
A gold pan — the essential tool for prospecting
A standard gold pan — the prospector's most essential tool. Green or blue pans show flour gold best against black sand. (Wikimedia Commons, CC BY)

Classifier Mesh Sizes

Mesh SizeOpeningBest For
1/2 inch12.7mmPrimary classification — remove big rocks
1/4 inch (4 mesh)6.3mmStandard field classification
1/8 inch (8 mesh)3.2mmFiner work — better flour gold recovery
20 mesh0.8mmFinal concentration — known flour gold areas
50 mesh0.3mmUltra-fine — microscopic glacial flour gold

Recommendation: Start with 1/2" in the field. Then 1/4" or 1/8" for panning. At camp, go to 20 mesh or finer for concentrate.

Gold Identification — Is It Real?

"Compared to actual gold, these minerals will flake, powder, or crumble when poked with a metal point, whereas gold will gouge or indent like soft lead." — U.S. Geological Survey

In glacial gold country, you'll encounter three main impostors: pyrite, mica, and chalcopyrite. Here's how to tell them apart — with photos.

The Big Four — Side by Side

Gold and pyrite side by side comparison
Gold (left) vs pyrite (right). Note gold's warm, rich yellow vs pyrite's pale brassy color. Gold is amorphous and rounded; pyrite forms sharp cubic crystals. (Wikimedia Commons)
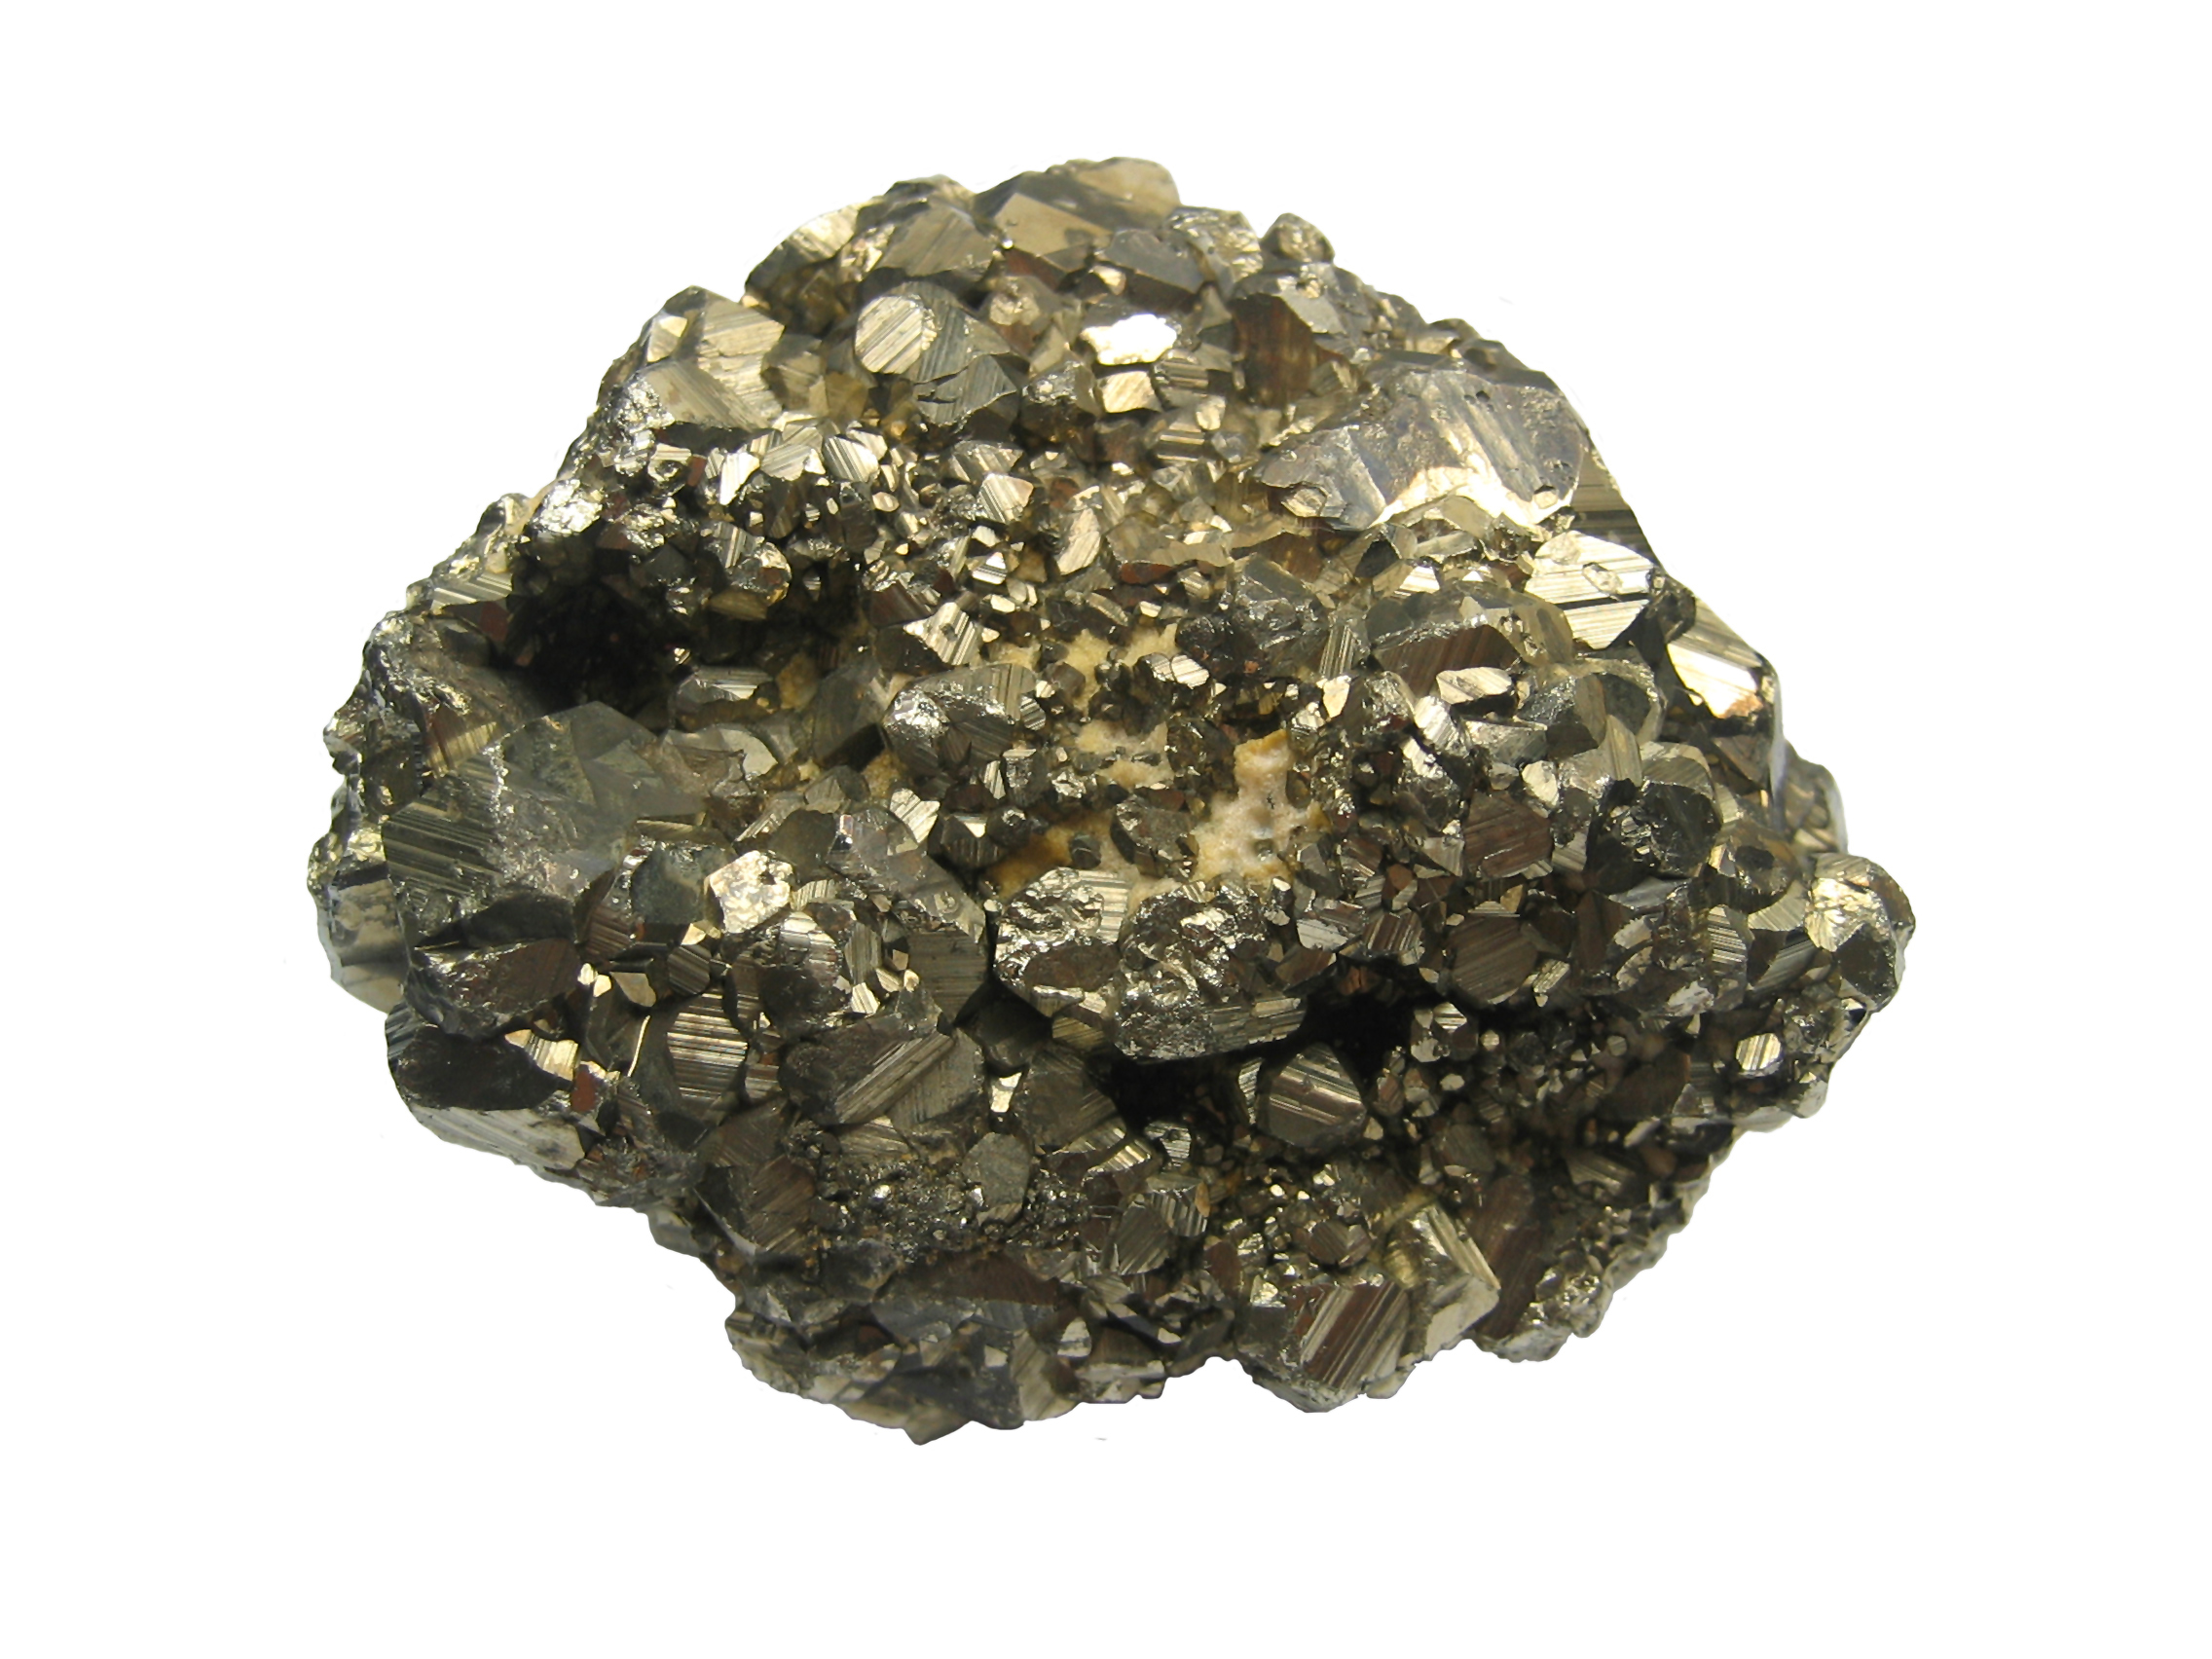
Macro photograph of pyrite — fool's gold cubic crystals
Pyrite (fool's gold) macro — note the sharp cubic crystal structure and brassy color. Gold NEVER forms cubic crystals. If it has sharp geometric edges, it's pyrite. (Wikimedia Commons)
Muscovite mica specimen — flat flaky mineral
Muscovite mica — flat, flaky, and often silvery-bronze. Mica FLOATS on water and peels in layers. If your "gold" is floating, it's mica! (Wikimedia Commons, GDFL)
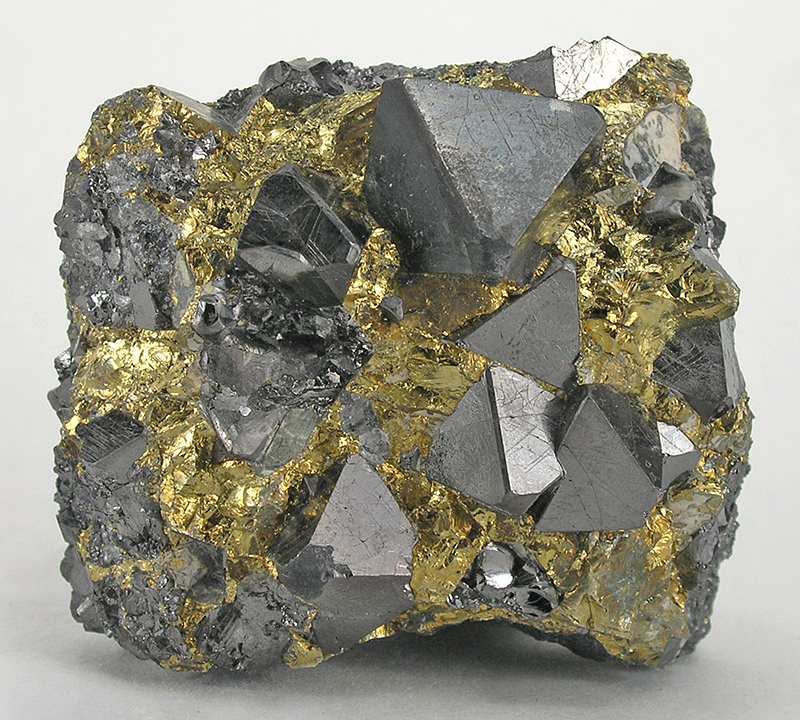
Chalcopyrite with magnetite specimen
Chalcopyrite (brass-yellow, left) with magnetite (black, right). Chalcopyrite tarnishes to iridescent colors — gold NEVER tarnishes. If it's got a rainbow sheen, it's not gold. (Wikimedia Commons, CC BY-SA)
PropertyGoldPyriteMicaChalcopyrite
ColorWarm golden-yellowPale brassySilvery/bronzeBrass-yellow
ShapeIrregular, roundedCubic crystals, sharpFlat, flaky sheetsGranular/massive
Hardness2.5-3 (dents when pressed)6-6.5 (shatters)2-2.5 (flexes, peels)3.5-4 (brittle)
In panStays at bottom, doesn't moveLighter, moves easilyFLOATS on surfaceLighter, moves
StreakGolden-yellowGreenish-blackWhite/colorlessDark
TarnishNever tarnishesOften tarnishedN/ATarnishes iridescent
Specific Gravity19.3 (very heavy)5.0~2.8 (very light)4.1-4.3

Quick Field Tests

1. The Pan Test (Easiest)

After panning down to concentrate, tap the side of the pan. Gold stays put at the very bottom — it's the heaviest thing in the pan. Pyrite moves around more easily. Mica floats on the surface.

2. The Color Test

Gold has a warm, rich, golden-yellow color. Pyrite is paler and brassier. "Pyrite has a brassy color. Gold has a golden to yellow color." With practice, you'll spot the difference instantly.

3. The Hardness Test

Place a tiny fragment on a hard surface. Gently tap with a hammer or press with a knife point. "A piece of real gold is highly malleable, so it will simply flatten out, bend, or dent." Pyrite shatters. Mica flexes and peels.

4. The Streak Test

Rub the specimen across an unglazed porcelain plate. "Real gold always leaves a brilliant, golden-yellow streak. Pyrite leaves a very different greenish-black or brownish-black mark."

5. The Float Test

Mica floats on water — it's flat and lightweight. Gold sinks immediately and stays at the bottom. If your "gold" is floating, it's mica.

6. The Tarnish Test

"Nuggets or small flakes of gold are usually bright and untarnished." Gold doesn't tarnish — it stays shiny forever. If your specimen has a tarnished or iridescent surface, it's not gold.

Gold left behind after pyrite weathered away
Gold (irregular blob) left behind after a cubic crystal of pyrite weathered away. Real gold is irregular and amorphous — it NEVER forms cubic crystals. If your specimen has geometric crystal faces, it's pyrite, not gold. (Wikimedia Commons, by Qfl247, CC BY-SA)
THE LOUPE IS YOUR BEST FRIEND
Much glacial gold is too small to see with the naked eye. A 10x or 20x jeweler's loupe is ESSENTIAL equipment. Look for tiny yellow specks among the black sand at the bottom of your pan. Flour gold appears as minute golden grains — warm yellow, not brassy. Never leave home without your loupe.

Equipment Guide — What You Need

Essential Creek Kit

ItemWhy You Need ItNotes
Gold pan (14", green or blue)The fundamental toolDark color shows flour gold. Deep riffles help trap fines.
Classifier/sieve (1/2" + 1/4")Screens out rocks before panningStackable on 5-gal buckets. Start 1/2", add finer for concentrate.
Shovel (round point or folding)Dig gravel from creek bedFolding for hikes, full-size for truck access spots
5-gallon buckets (2-3)Carry paydirt, classify into, store concentrateLabel with spot name using Sharpie. Bring lids.
Snuffer bottleSucks up fine gold from your panSqueeze, place tip near gold, release to suck it up.
10x or 20x jeweler's loupeMagnifies tiny flour gold specksEssential — much glacial gold is invisible without one.
Magnet (for black sand)Removes magnetite from concentrateKeep magnet inside plastic bag — slide bag off to release sand.
Crevice toolClean out bedrock cracks — #1 techniqueFlathead screwdriver works too.
Sharpie markerLabel buckets with spot nameDon't skip this — know which bucket came from where
Notebook + pencilRecord spots, observations, water levelsPencil doesn't run when wet.

Personal & Safety Gear

ItemNotes
Hip waders or knee bootsKeep dry in the creek. Felt-soled boots grip slick shale.
Bug sprayTicks are everywhere in the Northeast. Use DEET. Check yourself after every trip.
Sunscreen + hatHours in the creek = sun exposure. Wide-brim hat recommended.
GlovesGarden gloves for digging, nitrile for cold water
Rain jacketWeather changes fast in the mountains. Always carry one.
WhistleThree blasts = SOS
Phone in waterproof bagFor navigation, photos, emergencies.

Sluicing & Fine Gold Processing

A sluice box processes far more material than panning alone — essential for glacial gold where you need volume to find scattered fines. Water flows over riffles, heavy gold drops behind the riffles, lighter material washes out.

Historical wooden sluice box used for gold prospecting in California, 1890-1915
A wooden sluice box in California, circa 1890-1915. Modern sluice boxes use the same principle — flowing water over riffles to catch heavy gold while lighter material washes away. (Wikimedia Commons, Denver Public Library)

Sluice Setup for Flour Gold

  1. Choose the right sluice: Fine gold sluices with miner's moss or ribbed matting under the riffles capture flour gold better.
  2. Set the slope: Gentle slope — about 1" drop per foot. Too steep and flour gold washes out. Too flat and material clogs.
  3. Classify before sluicing: Screen to 1/2" or finer. Classification prevents rocks from dislodging captured fines.
  4. Feed slowly: Don't overload. Feed in small scoops at a steady pace. Rushing is the #1 cause of lost flour gold.
  5. Check the matting: Look for black sand buildup in the riffles — that's where your gold is accumulating.
  6. Clean out carefully: Pull the riffles and carefully wash the matting into a pan. ALL the gold is trapped in the moss.

The Black Sand Problem

Black sand is both your best friend and biggest challenge. It's the #1 indicator that gold might be present — but it fills your pan/sluice.

Managing black sand:

Safety in the Field

WATER SAFETY — READ THIS BEFORE YOU GO

Before You Go

Flash Floods & Gold

"Extreme high water events can dislodge gold from bedrock and place them up in all kinds of odd locations." After a flood, creeks re-sort their gravel — new gold can be deposited in new locations. Some of the best panning happens AFTER a major storm, once the water recedes to safe levels.

But never go during high water. Wait until the water drops, then check the newly deposited gravel. Flood events can expose fresh bedrock, create new gravel bars, and move gold into new positions.

Quick Reference Card

GLACIAL GOLD — POCKET GUIDE

The 7 Gold Traps

  1. Inside bends (water slows on the curve — gold deposits on the INSIDE)
  2. Behind boulders (eddy drop zones — dig on the DOWNSTREAM side)
  3. Bedrock cracks (#1 for flour gold! — clean out EVERY crack)
  4. Drop zones (where fast water slows — pan along the foam line)
  5. Gravel bar heads (upstream tip — where heavies deposit first)
  6. Confluences (where creeks meet — work downstream side)
  7. Low-water exposed gravel (sorted by thousands of flood events)

Flour Gold Panning — 10 Steps

  1. Pick your spot (inside bend, behind boulder, bedrock crack)
  2. Dig top 6-12 inches above bedrock/clay
  3. Classify to 1/2 inch (remove big rocks)
  4. Fill pan 1/2 to 2/3 full
  5. Submerge and break up ALL clay
  6. SLOW, GENTLE swirling — let water do the work
  7. Work down to black sand concentrate
  8. Tap to settle heavies
  9. Inspect with 10x/20x loupe
  10. Snuffer bottle to collect color

Gold vs Fool's Gold — Quick Check

Indicator Minerals

Realistic Expectations

"Gold can and does occur just about anywhere [in NY]... glacial drift gold deposited by receding glaciers over 10,000 years ago that brought rich gold bearing gravels down from Canada." — GoldRushNuggets.com
A placer gold nugget from a detritic deposit
A placer gold nugget — the dream that keeps every prospector going. In glacial gold country, finding even a tiny picker like this would be an exceptional day. But every speck of flour gold is a victory worth celebrating. (Wikimedia Commons)
The gold is there. The glaciers brought it. Your job is to outsmart the river.

Now get out there and find some color! 🪙